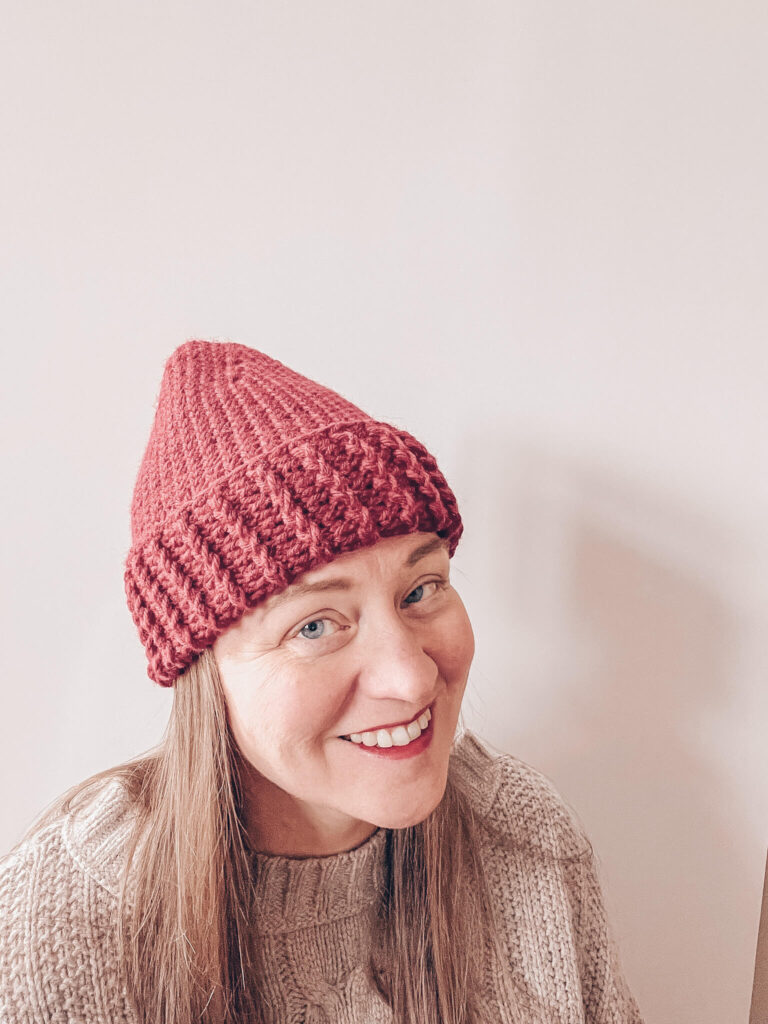
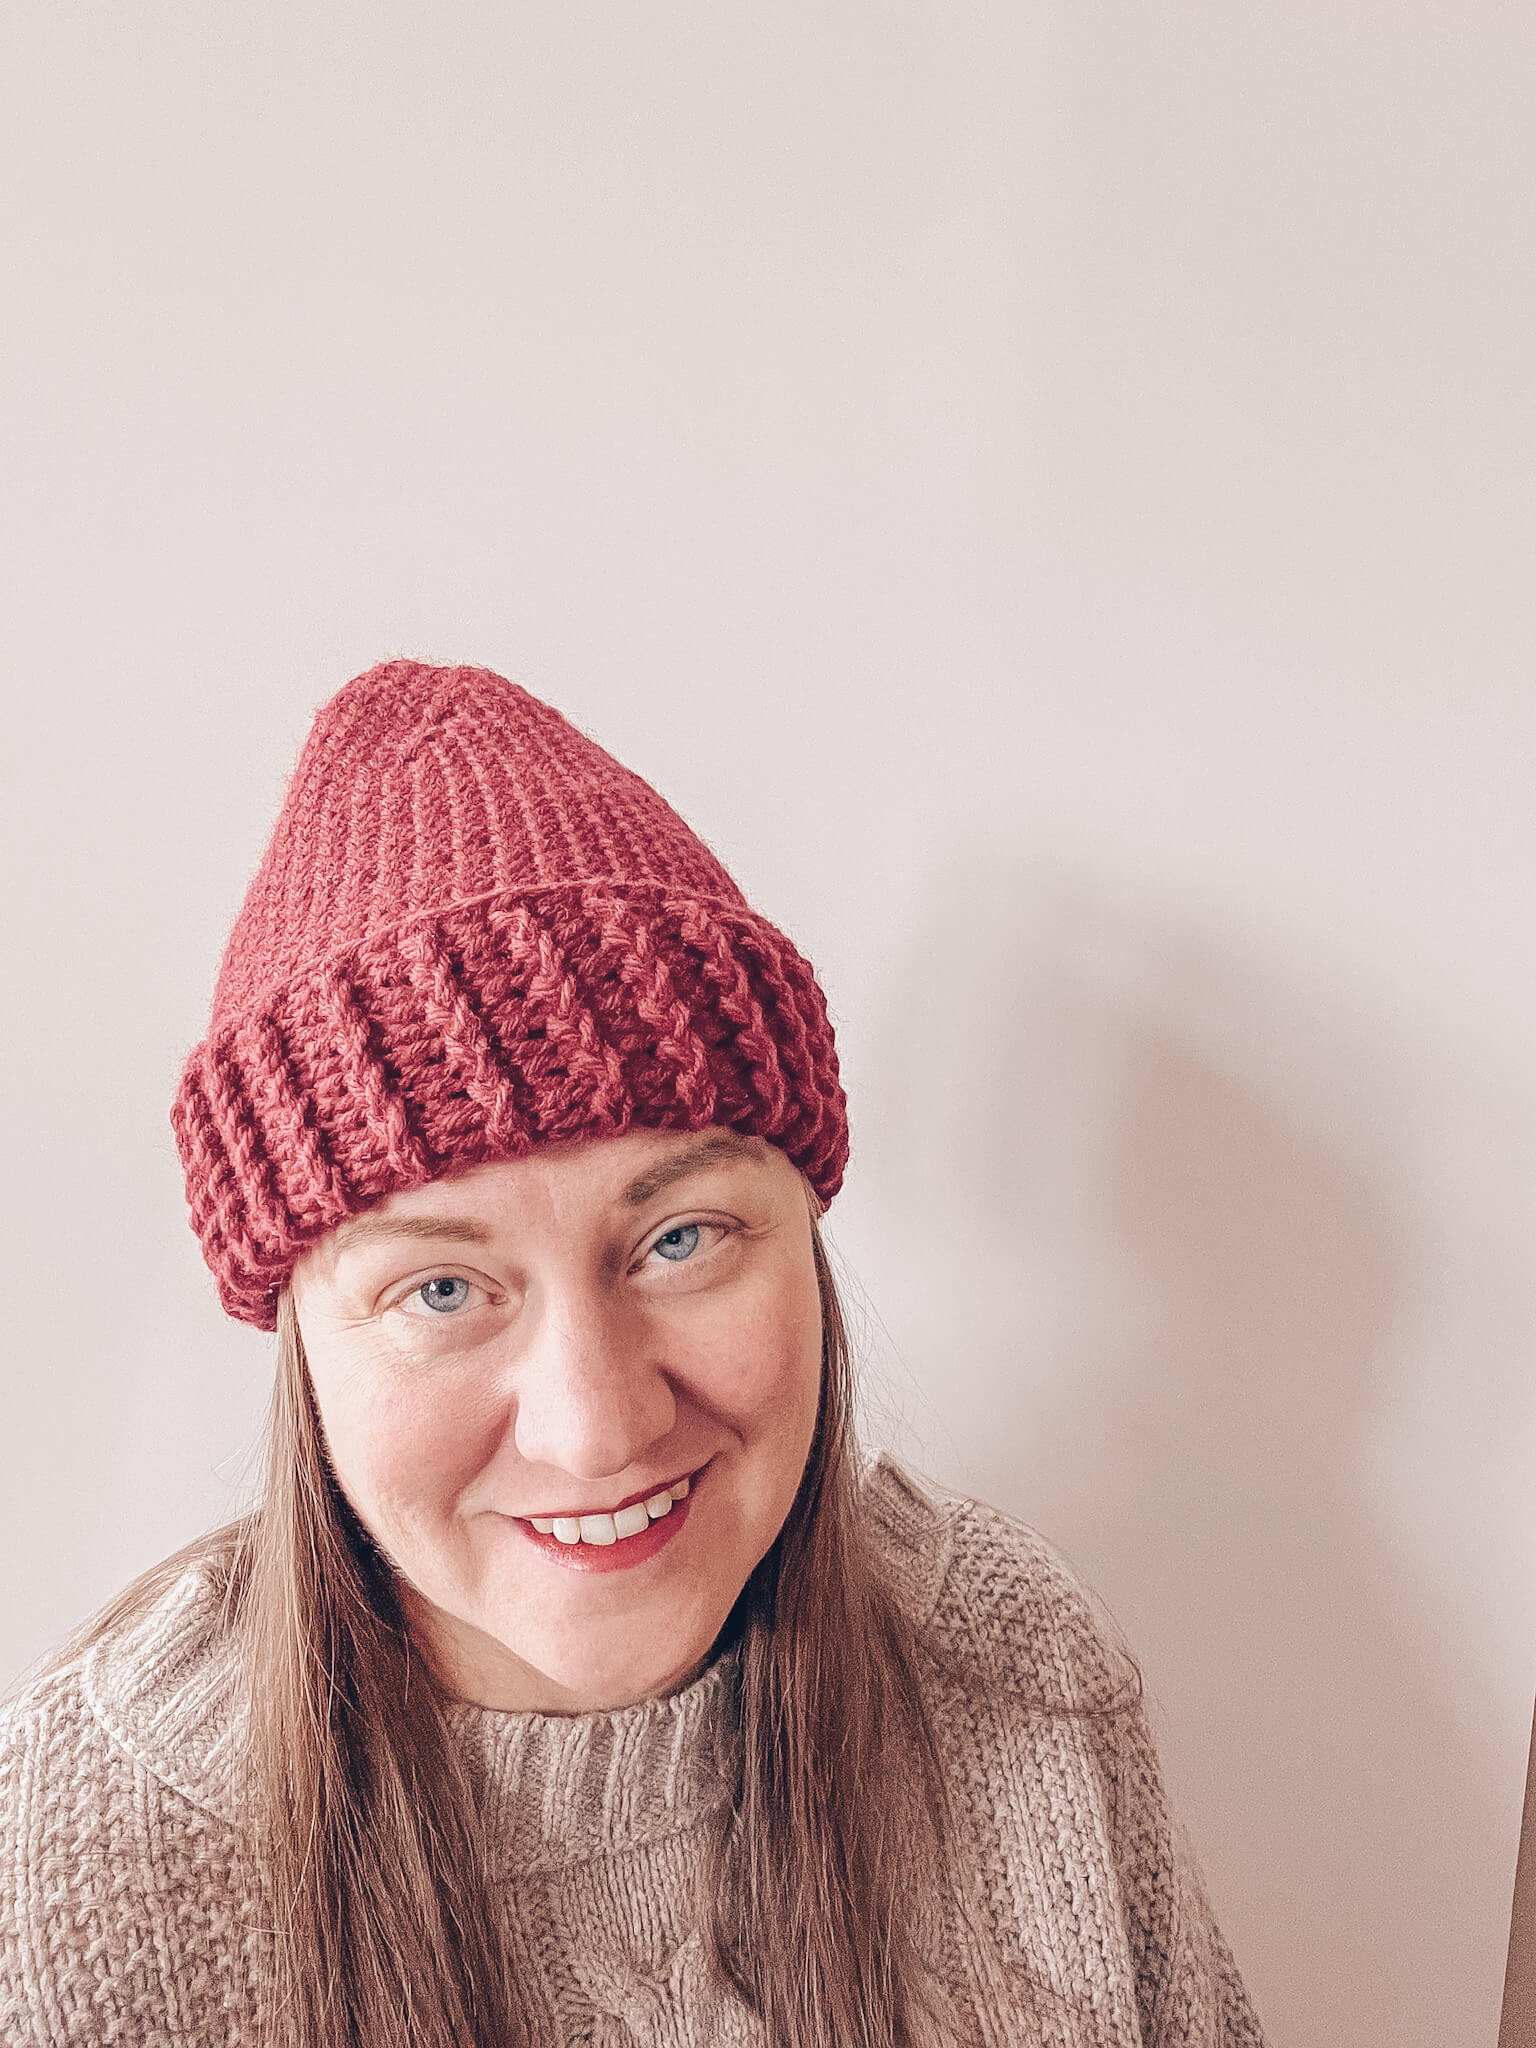
Hello! Welcome back to 12 Weeks of Beanies and the free knit-look crochet pattern for Beanie No 8! I’m super excited about this free knit-look crochet beanie pattern since it uses a new(ish) stitch that I’ve only used once before, but I’ve got a tip for you that will help make using this stitch a breeze! This knit-look crochet Beanie No 8 is part of a series of beanie patterns designed with the beginner knitter or crocheter in mind as well as developing new skills in knitting and crochet. Every new crafter needs an easy, yet beautiful, hat project that is cute and interesting while still being easy to make, and this free knit-look crochet Beanie No 8 is exactly that!
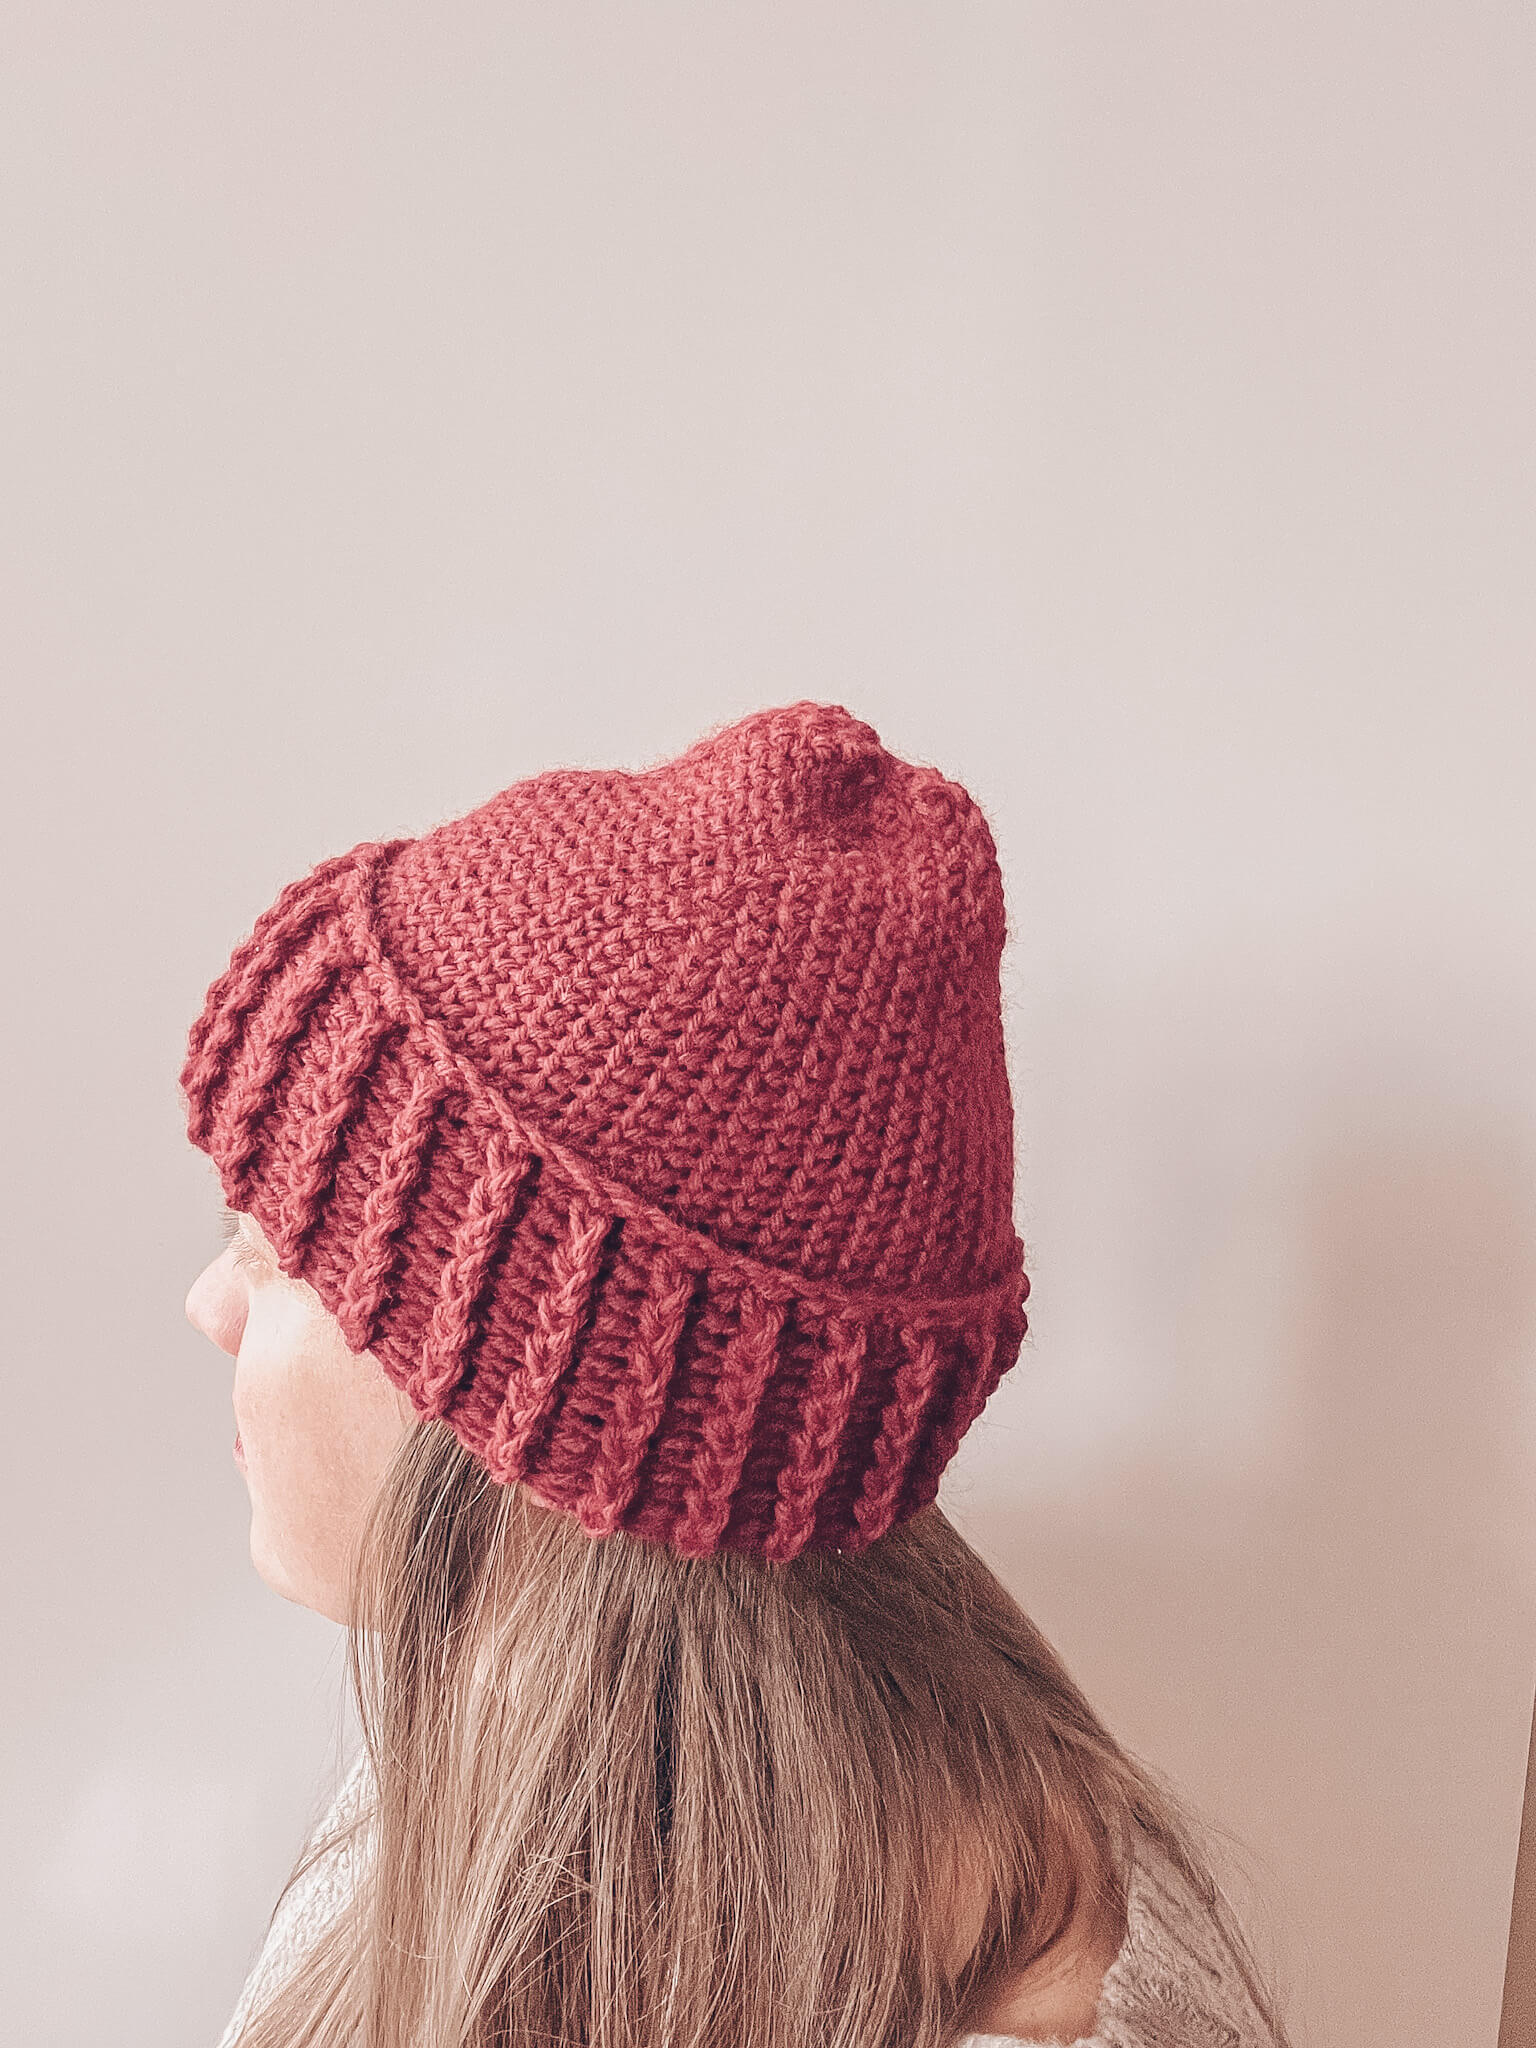
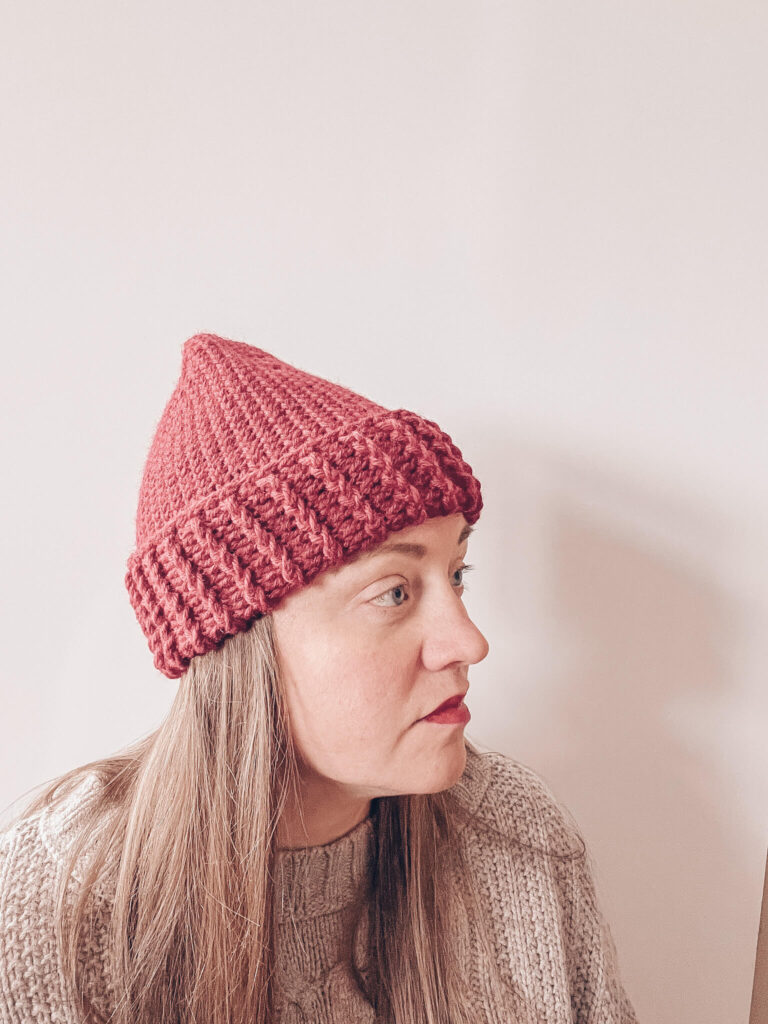
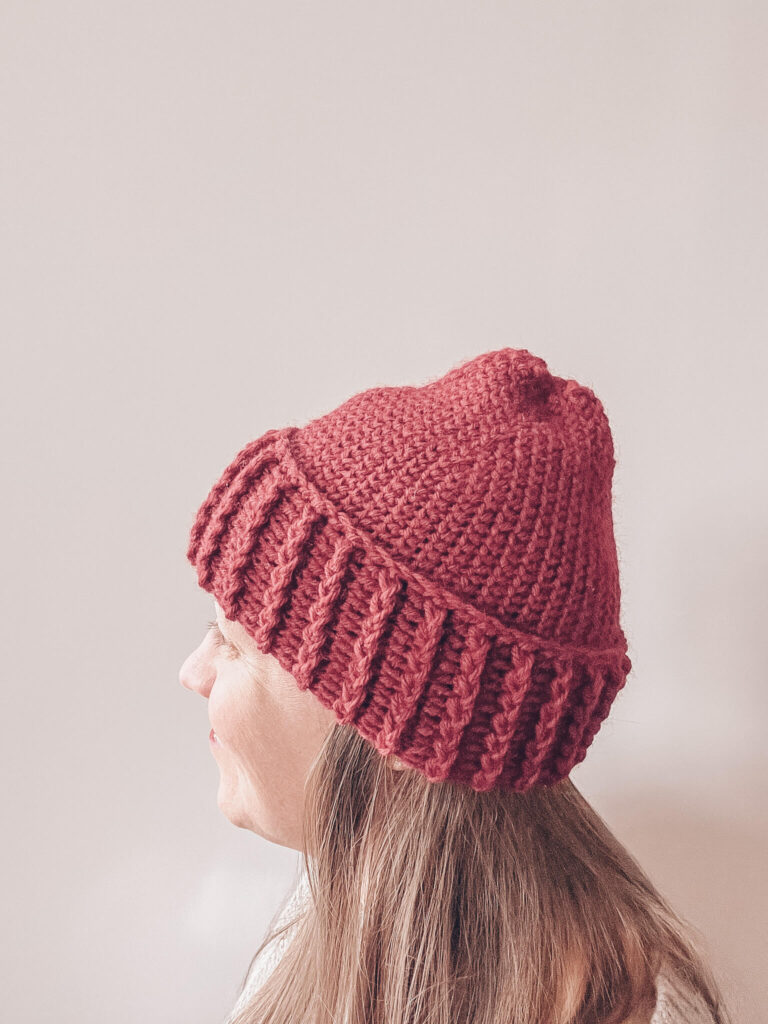
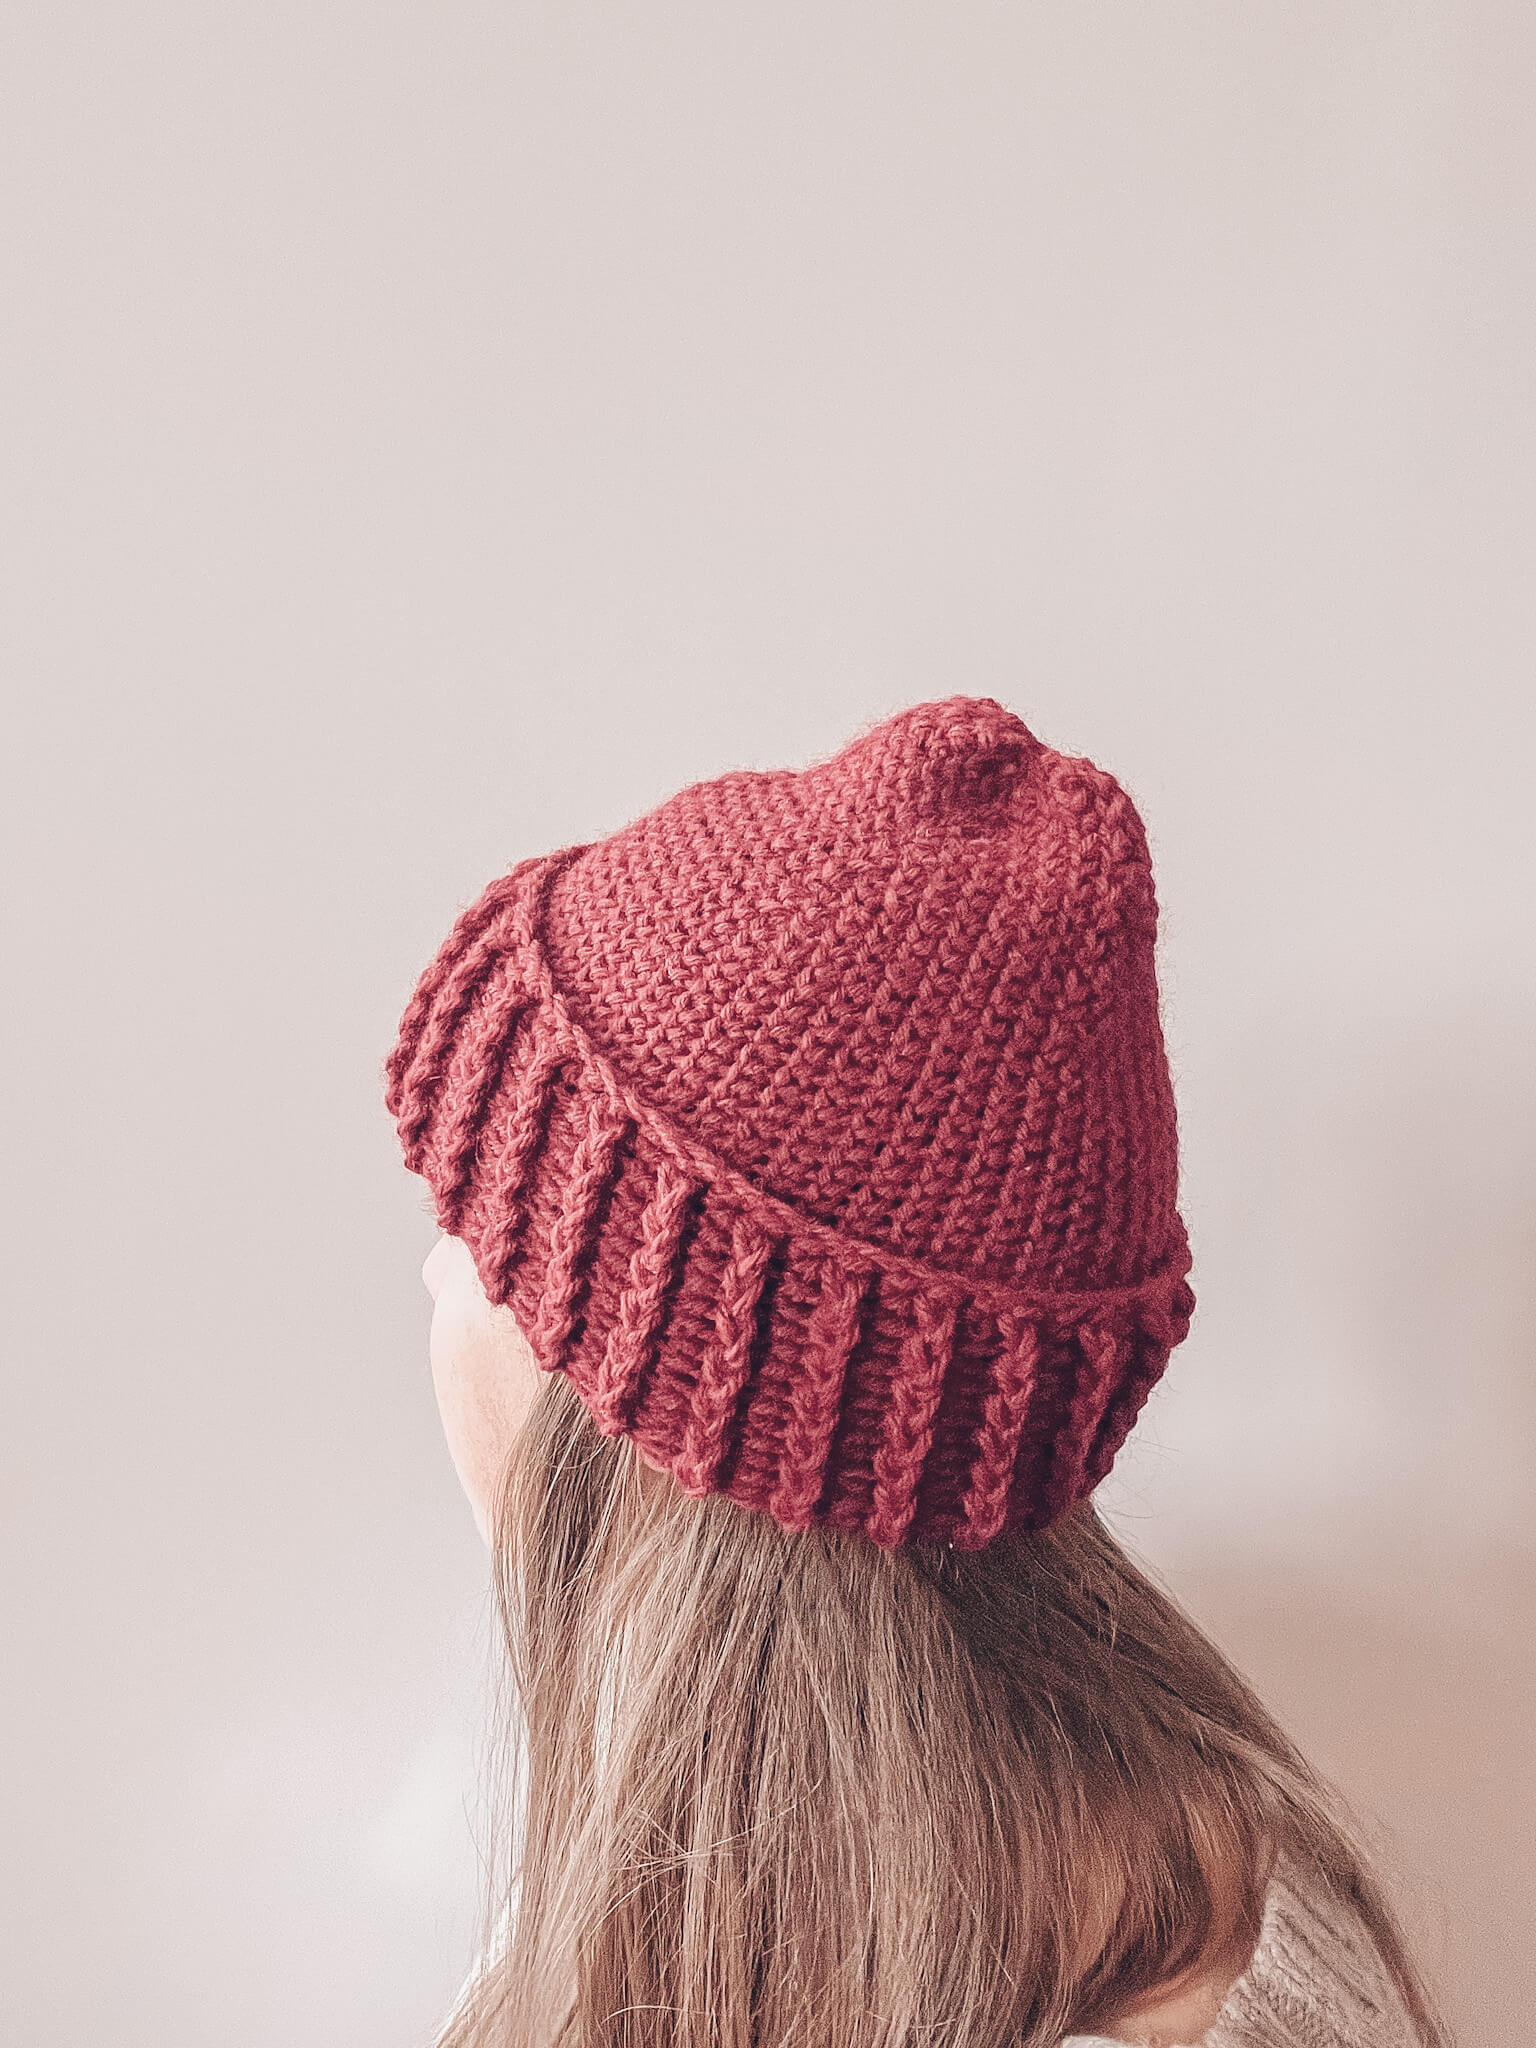
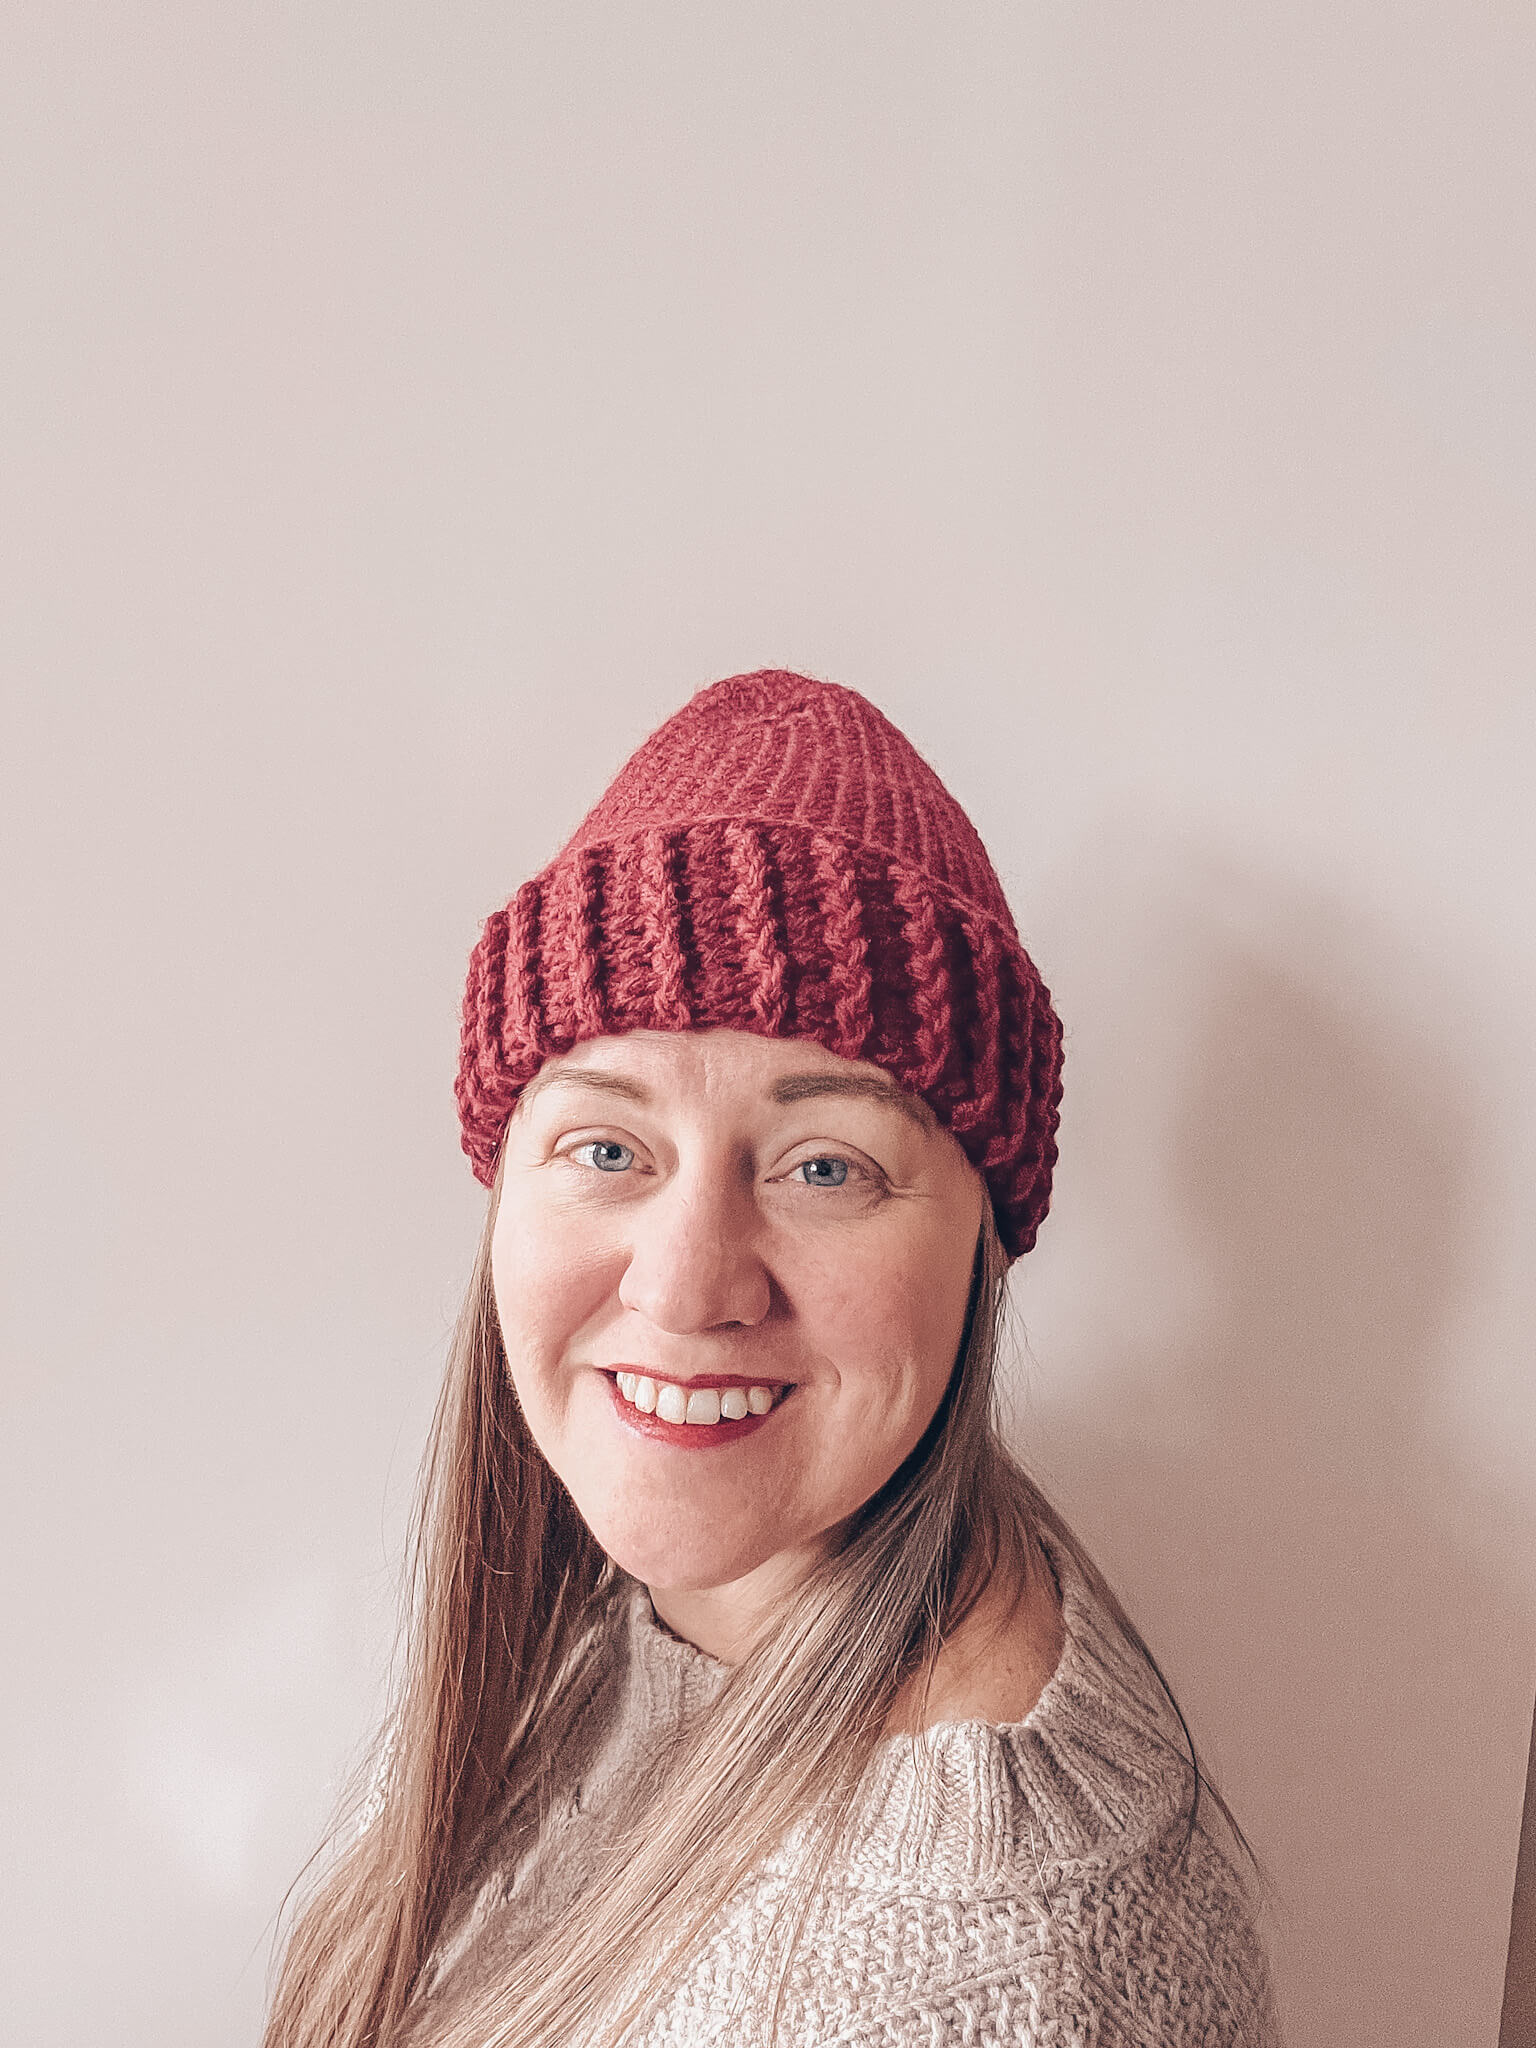
This beanie hat pattern is fast to make – it took me just over two hours to make mine. I used Lion Brand Wool Ease in the color Cranberry and it has the best stitch definition to it while also being warm and budget-friendly. This hat would also look great in a speckled colorway where all those speckles can clearly stand out with the clean stitch definition. Regardless of the yarn you use, the waistcoat stitch used in this beanie creates a really nice and clean stitch pattern that truly does look knitted!
So what IS the waistcoat stitch? It’s really just a single crochet stitch where you insert your hook into a different spot to create a little V shape instead of the usual boxy looking single crochet. You’ll insert your hook into the V created by the post and then work the waistcoat stitch the same as you would a single crochet. It’s quite easy to learn, it just takes a little practice to identify where to insert your hook and how to work around the post. I’ve linked to a tutorial below so you can see exactly how to crochet this stitch.
Plus, just a little tip – if you pull the first leg of the V to the side and insert your hook directly under the top of the stitch, instead of the to the side of the post, your stitches will line up really nicely instead of biasing to the side.

As always, I want to mention that this ENTIRE beanie series is FREE. I think it’s important for beginners to have access to free patterns to work on their skills before progressing to paid patterns, so you’ll find every single one of the 12 Weeks of Beanies hats for free on my blog. You can find the first beanie in the series here, but don’t miss out when a new pattern drops! Sign up for my newsletter to be notified of new designs before anyone else!
AND – I plan to make these 12 beanie patterns into an eBook that you can purchase from my website or on Ravelry.com once they’ve all been published here on my blog! The eBook will be professionally formatted, include a range of sizes for each beanie pattern, and be a great collection of beanies you can refer to every year for personal and gift crocheting or knitting.
Instructions include:
- Construction + Fit/Ease
- Yarn Notes
- Yarn Amounts
- Hook Size
- Notions Required
- Gauge
- Sizes
- Hat Schematic
- Swatching Notes & Directions
- Stitch Abbreviations
- Special Stitches
- Tutorials
- Notes
- The Beanie Pattern!
- Finishing Notes
- Copyright Notes
Disclaimer: Some of the links included in this pattern are sponsored links, which means that if you choose to click on them, I’ll receive compensation from the company at no cost to you. By clicking on these links, you’ll help me be able to continue providing free patterns. It’s a win/win for both of us!
Construction + Fit/Ease
Beanie No 8 is constructed bottom up in the round. It starts with a chain, the brim section is worked first, then the body, and then decreases are worked through the crown. The hat also incorporates negative ease to keep it snug and tight over your ears for maximum warmth.
Yarn Notes
I’ve had this Lion Brand Wool Ease yarn in my stash for a little while now, and I absolutely love working with Wool Ease. It’s a really beautiful mix of wool and acrylic. I know some people are allergic to wool, but I really love the bounce-back wool adds to the structure of the hat. Even if you’re allergic to wool, this pattern will work with an all-acrylic yarn. Just be sure you get the same size yarn – look for that 4 yarn symbol or the words worsted weight yarn. Worsted weight size 4 yarn is the most commonly sold yarn size so it should be pretty easy to substitute if you don’t like wool. Here are some options:
$ Lion Brand Wool Ease – this is the yarn I used
$ Worsted/Medium Size 4 Yarns from Joann’s – All of these size 4 yarns will work, but I would caution you about using cotton. It doesn’t hold its shape as well as wool or acrylic, but if you live somewhere warmer, cotton will work!
$ Patons Wool Yarn Worsted Weight – if you’re looking for good stitch definition, warmth, AND budget-friendly, Patons Wool is the way to go!
Yarn Amounts
*FYI – The yarn amount listed here is enough for a swatch and the hat.
- 2 skeins Lion Brand Wool Ease 80% Acrylic/20% Wool, 85g/197yds
Hook
Size J 5.75mm hook
Notions
1 locking stitch marker
Embroidery Needle for weaving in ends
Gauge
11 stitches x 16 rows = 4”x4”
- 2.75 stitches per inch
- 4 rows per inch
Schematic
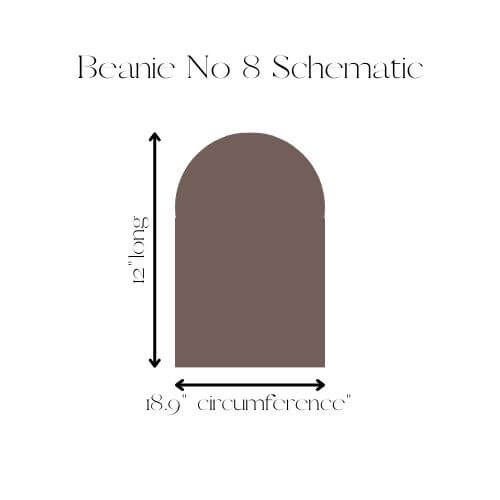
Size
Adult Size Small to fit head circumferences 19-20″”
- Finished circumference 18,9″”
- Height from Crown to Brim = 12”

Swatch Directions
If you don’t know how to crochet the waistcoat stitch (wsc), then make sure you watch the video tutorial linked below.
- Set Up Row: Chain 20. Join first and last chains with a slip stitch to form a circle – 20 sts.
- Row 1 (RS): Ch 1, *sc into back loop of first ch and into each chain around. Do not join. PM in first st to mark BOR – 20 sts.
- Row 2: Wsc around – 20 sts.
- Rows 3-12: Repeat Row 2. Bind off, block.
Stitch Abbreviations
- BLO – back loop only
- Bor = beginning of round
- Ch = chain
- Fpdc = front post double crochet
- MC = main color
- Pm = place marker
- RS = right side
- Sc = single crochet
- Sc blo = single crochet in back loop only
- Sl st = slip stitch
- WS = wrong side
- Wsc = waistcoat stitch single crochet
- Wsc dec = waistcoat stitch decrease
- Wsc2tog = single crochet 2 stitches together
- Yo = yarn over
Special Stitches
- Fpdc – Yo, insert hook around post of st 2 rows below, yo, pull up a loop, yo, pull through 2 loops, yo, pull through 2 loops.
- Sc blo – insert hook into back loop only of the single crochet stitch, yo, pull up a loop, yo, pull through all loops on hook. One stitch made.
- Waistcoat stitch single crochet – insert hook into the v created by the post of the indicated stitch, yo, pull up a loop, yo and pull through two loops. One stitch made.
- Waistcoat stitch decrease – Insert hook into regular spot for a single crochet, yo, pull up a loop, insert hook into V spot for a waistcoat stitch single crochet, yo, pull up a loop, yo, pull through all three loops. One stitch decreased.
- Wsc2tog – insert hook into first wsc using wsc st, yo, pull up a loop, insert hook into second wsc using wsc st, yo, pull up a loop, yo, pull through all loops. One stitch decreased.
Tutorial
Waistcoat Stitch: https://www.youtube.com/watch?v=K-vL-NNA_fY
Pattern
Brim
Note: Hat is crocheted in the round without joining. Only join where specified in instructions.
Foundation Round 1 (RS): Ch 53. Sl st into first chain to join in the round. Skipping the first chain loop, sc into the back loops of each ch around. Pm in first st. 52 sts.
Round 2 (RS): Ch 1, sc around. 52 sts.
Round 3: *Sc, FPDC, repeat from * around. 52 sts.
Round 4: SC around. 52 sts.
Rounds 5-15: Repeat rounds 3 & 4 ending with sl st into 1st sc at end of round 15. 52 sts.
Move to body section.
Body
Round 1: Ch 1, sc in BLO around. 52 sts.
Round 2: Wsc in each stitch around. 52 sts.
Rounds 3-23: Repeat round 2. 52 sts.
Move to Crown.
Crown
Round 1: *Wsc2tog, wsc 8, repeat from * around ending with Wsc2tog. 41 sts.
Round 2: Wsc around. 41 sts.
Round 3: *Wsc2tog, wsc 7, repeat from * around ending with Wsc2tog. 30 sts.
Round 4: Wsc around. 30 sts.
Round 5: *Wsc2tog, wsc 6, repeat from * around. 20 sts.
Round 6: Wsc around. 20 sts.
Round 7: Wsc2tog around. 10 sts.
Round 8: Wsc around. 10 sts.
Move to Finishing
Finishing
Cut yarn leaving a long tail. Using an embroidery needle, weave the tail through the 10 remaining crown stitches and pull to close. Knot tail to secure and weave in ends. Block as desired. Enjoy your new knit-look beanie!
Copyright Notes
It’s not nice to copy other people’s work so let’s not do that! All text and photos copyright 2023 by Regarding Yarn. No part of this pattern may be duplicated or sold. Final products made from this pattern are for personal use only and may not be sold.