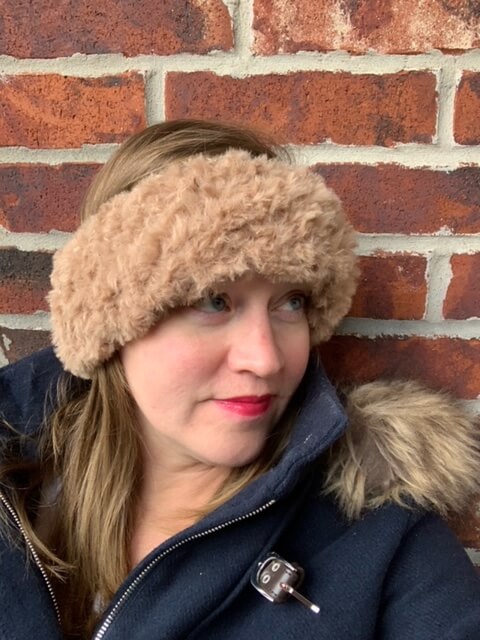
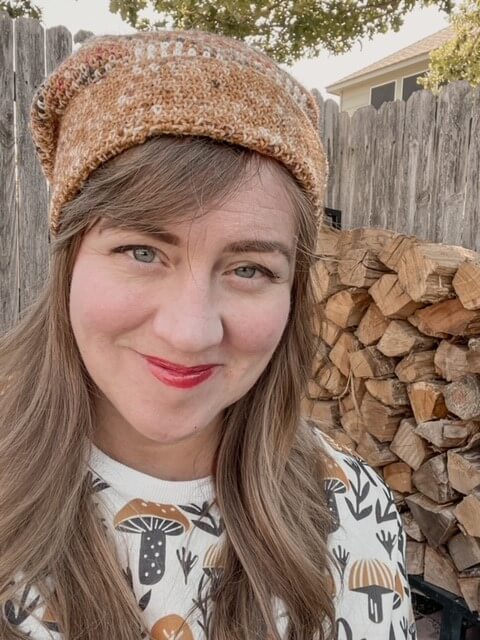
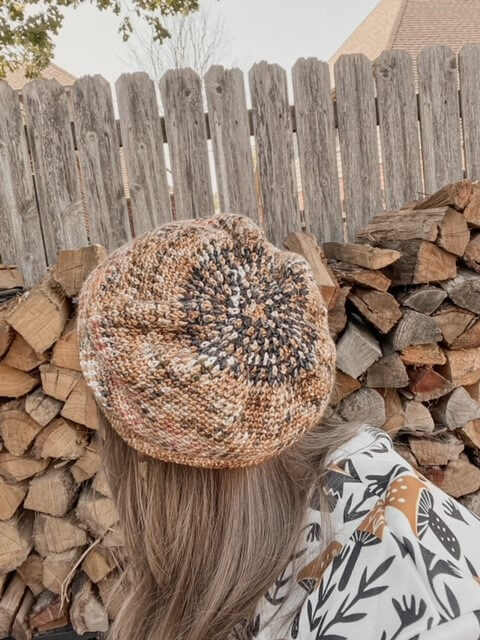
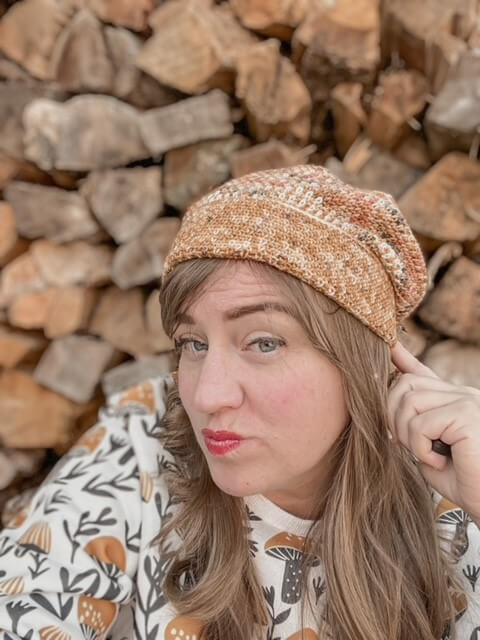
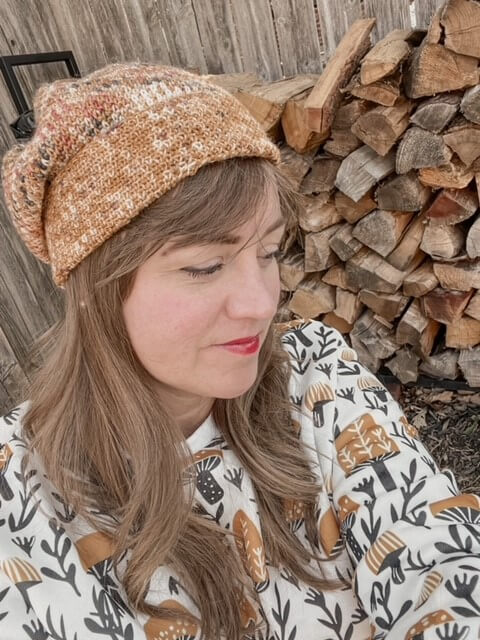
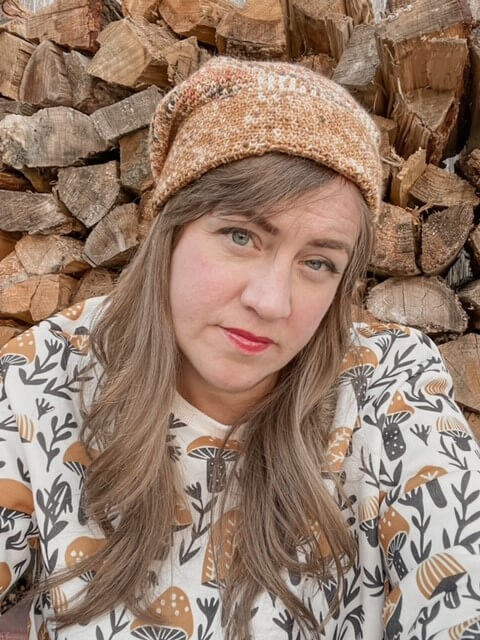
Welcome to 12 Weeks of Beanies! This free crochet pattern Beanie No 1 is perfect for the beginner crocheter! The free crochet pattern Beanie No 1 is the first in a series of beanie patterns designed with the beginner knitter or crocheter in mind. Every new crocheter needs an easy, yet beautiful, hat project that is interesting while still being easy to memorize and crochet. The free crochet pattern Beanie No 1 is exactly that!
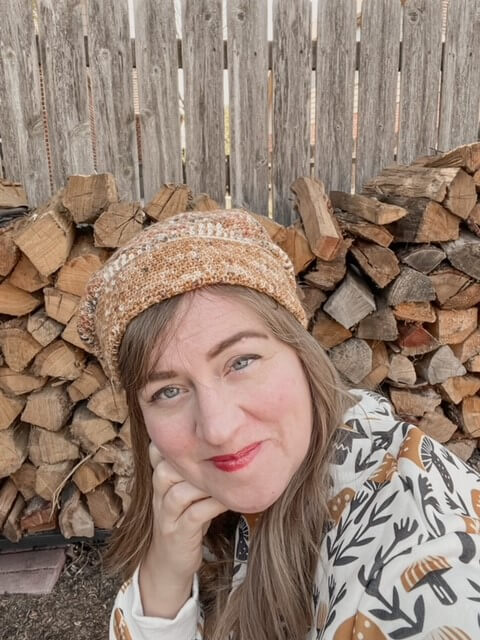
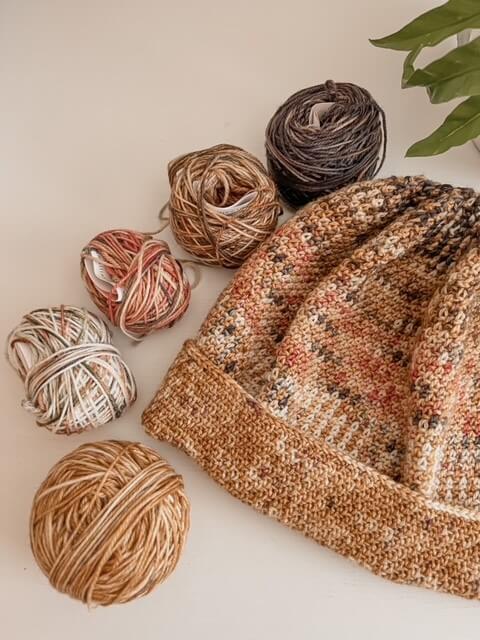
The free crochet pattern Beanie No 1 was created specifically with advent yarn minis in mind, and this gorgeous beanie uses indie dyed yarns to create a marled texture while only using basic crochet stitches. Tutorials are included for using a magic circle, how to switch yarn colors, fastening off, weaving in, and blocking. If you can slip stitch, chain and single crochet, then you can totally crochet the free crochet pattern Beanie No 1!
Have I also mentioned the ENTIRE beanie series is FREE? Yep!! You’ll find every single one of the 12 Weeks of Beanies hats for free on my blog. This is just the first one, so don’t miss out when a new patterns drops! Sign up for my newsletter to be notified of new designs before anyone else!
AND I have a little surprise for ya too – I plan to make these 12 beanie patterns into an eBook that you can purchase from my website or on Ravelry.com once they’ve all been published here on my blog! The eBook will be professionally formatted, include a range of sizes for each beanie pattern, and be a great collection of beanies you can refer to every year for personal and gift crocheting or knitting.
Instructions include:
- Construction + Fit/Ease
- Yarn Notes
- Yarn Amounts
- Hook Size
- Notions Required
- Gauge
- Sizes
- Hat Schematic
- Swatching Notes & Directions
- Stitch Abbreviations
- Special Stitches
- Tutorials
- Notes
- The Beanie Pattern!
- Finishing Notes
- Copyright Notes
Disclaimer: Some of the links included in this pattern are sponsored links, which means that if you choose to click on them, I’ll receive compensation from the company at no cost to you. By clicking on these links, you’ll help me be able to continue providing free patterns. It’s a win/win for both of us!
Construction + Fit/Ease
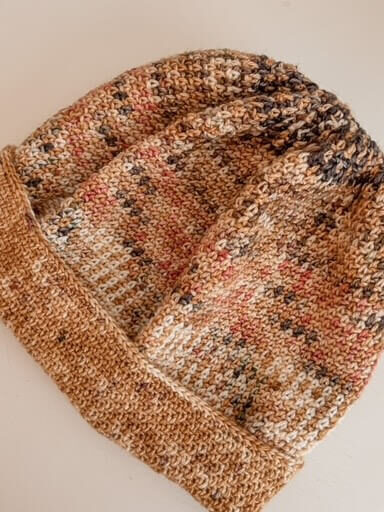
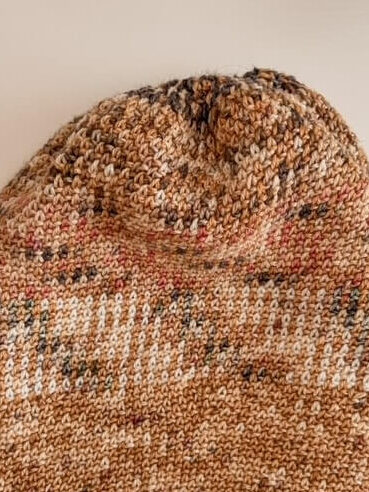
Beanie No 1 is constructed top-down in the round. It starts with a magic circle, increases are worked at the crown, the body is worked, and then the fold-over double brim is worked last. The hat has a negative ease of 2” to keep it snug and tight over your ears for maximum warmth.
Yarn Notes
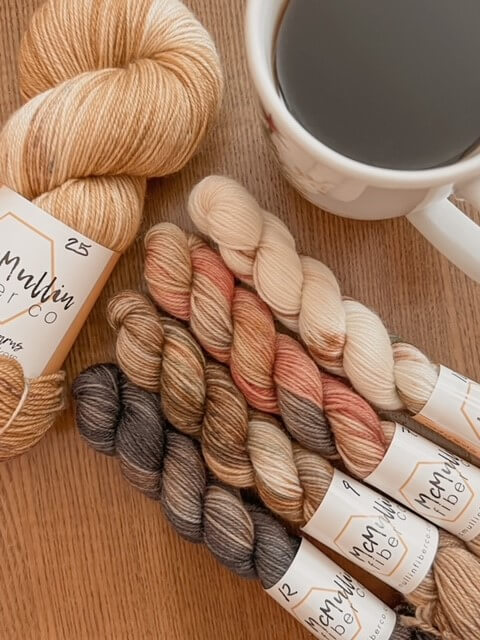
I chose to use yarn from the McMullin Fiber Co 2021 Chiltern Classics Advent Collection for my hat, which consisted of 24 mini skeins and one full skein, all in fingering weight yarn. You can order your own Chiltern Classics advent yarn too, or simply pick 5 colors of fingering weight yarn that work well together for your hat. Some great yarn choices for this hat include:
$$ McMullin Fiber Co Chiltern Classics Advent Set or any of her other Fingering Weight Yarns
$$$ Madeline Tosh Fingering Weight Yarns – there are soooo many good choices here!!
$ Patons Kroy Socks or Big Twist Yarns from Joanns

Yarn Amounts
*FYI – The yarn amounts listed here include enough yarn to make 2 swatches.
- Main Color: 1 Squishy Skein fingering weight yarn in color Golden Pages, 80% Superwash Wool/20% Nylon, 420 yards/115 grams
- Contrast Color 1: 1 Mini Skein fingering weight yarn in color The Picture of Dorian Gray, 80% Superwash Wool/20% Nylon, 90 yards/25 grams
- Contrast Color 2: 1 Mini Skein fingering weight yarn in color Sense & Sensibility, 80% Superwash Wool/20% Nylon, 90 yards/25 grams
- Contrast Color 3: 1 Mini Skein fingering weight yarn in color The Secret Garden, 80% Superwash Wool/20% Nylon, 90 yards/25 grams
- Contrast Color 4: 1 Mini Skein fingering weight yarns in color Little Women, 80% Superwash Wool/20% Nylon, 90 yards/25 grams
Hook
Size E/4 3.25mm hook
Notions
1 locking stitch marker
Embroidery Needle for weaving in ends
Gauge
27 stitches x 28 rows = 4”x4”
- 6.75 stitches per inch
- 7 rows per inch
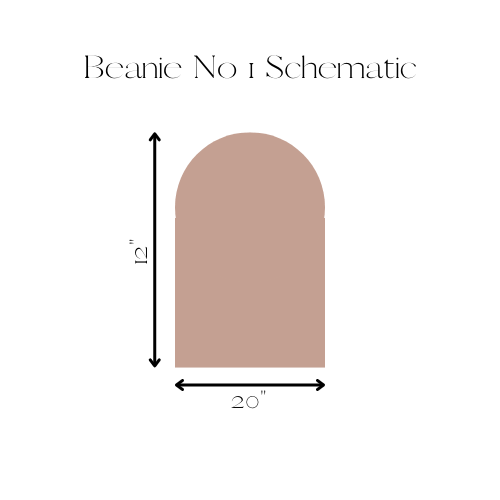
Schematic
Sizes
Adult Size Large to fit head circumferences 21-23”
- Finished circumference 20”
- Height from Crown to Brim = 12”
Swatch Notes
Usually a swatch is worked the same way your project is worked, so for a hat, you’d normally make a swatch in the round. When I swatched though, I actually created two swatches – one flat, and one in the round, and then worked the hat according to the round swatch gauge. I found, however, after I had finished the crown increases, and was working the body of the hat, that my work actually switched back to the flat gauge, so a flat gauge will actually give you a more accurate gauge than swatching in the round for this hat. That said, I’ve included yardage to make two swatches if you’d like, one flat + one in the round.

Swatch Directions
This swatch is worked flat, back and forth, in moss stitch pattern. If you’d like to swatch in the round, follow the pattern instructions for rows 1-35 below.
- Set Up Row: Chain 35. Turn.
- Foundation Row (WS): Sc into the second ch from hook and into each ch across. Ch 1, turn. 34 SC.
- Row 1 (RS): Ch 1, skip first sc, *work (sc, ch 1) in next stitch, skip next stitch. Repeat from * across ending with sc in last ch space, ch 1, turn. 17 SC and 17 chains.
- Row 2 (WS): Ch 1, skip first sc, *work (sc, ch 1) in next ch space, skip next sc. Repeat from * across ending with sc in last ch space, ch 1, turn. 17 SC and 17 chains.
- Repeat row 2 (32) more times for a total of 34 rows. Fasten off, block.
Stitch Abbreviations
- Ch = chain
- CC1 = contrast color 1
- CC2 = contrast color 2
- CC3 = contrast color 3
- CC4 = contrast color 4
- MC = main color
- Sl st = slip stitch
- Sc = single crochet
- SC2TOG = single crochet 2 together
- RS = right side
- WS = wrong side
Special Stitches
SC2TOG = insert hook into first stitch, yarn over and pull up a loop, insert hook into second stitch, yarn over and pull up a loop, yarn over and pull yarn through all three loops on hook.
Tutorials
Magic circle: https://www.youtube.com/watch?v=p298HxgsO1s
Switching yarns/Adding a New Ball of Yarn: https://www.youtube.com/watch?v=VlujpTjY-fs
Fastening off & Weaving in Ends: https://www.youtube.com/watch?v=xkKaCmtOGF4
Blocking: https://www.youtube.com/watch?v=yYBmnQy28xk
Notes
*As I mentioned in the swatch section, usually a swatch is worked the same way your project is worked, so for a hat, you’d normally make a swatch in the round. When I swatched, I actually created two swatches – one flat, and one round, and then worked the hat according to the round swatch gauge. I found, however, after I had finished the crown increases, and was working the body of the hat, that my work actually switched back to the flat gauge, so a flat gauge will actually give you a more accurate gauge than swatching in the round for this hat.
*It may be helpful to place the locking stitch marker in the first space of the round after you’ve worked the second (sc, ch 1) of the round so the chain has been finished and is “closed” by the next sc.
*The starting ch space of each round will move one stitch after each round. This is fine and will not impact the hat.
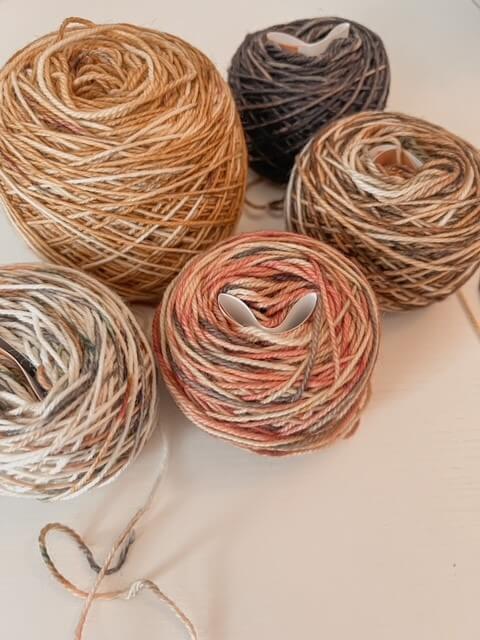
*To get the marled textural effect, you will switch yarns after every round once you’ve completed round 2. I’ve noted in each section which yarns to use and when to switch colors.
Pattern
Crown Increases
NOTE: For this section, you will switch between your MC and CC1 every round after row 2. So for the foundation round and round 1, use the MC. For round 2, use CC1. For round 3, switch back to MC. For round 4, switch back to CC1. Continue switching MC and CC1 every round through round 12.
Foundation Round 1 (RS): Using MC, make a magic ring and work 5 sc into ring. Sl st into top of first sc and pull foundation yarn string tightly to close. 5 SC.
Round 2 (RS): Ch 1, work (sc, ch 1) into each sc around, placing a locking stitch marker into the top of the first sc in the round after working that stitch. 5 SC, 5 ch.
Round 3: Switch colors, skip first sc, work (sc, ch 1) twice into next ch space, move stitch marker to first ch sp, *work (sc, ch 1) twice into next ch space, repeat from * around. 10 SC, 10 ch.
Round 4: Switch colors, skip first sc, work (sc, ch 1) into next ch space, move stitch marker to first ch sp, *work (sc, ch 1) into next ch space, repeat from * around. 10 SC, 10 ch.
Round 5: Repeat Round 3. 20 SC, 20 ch
Round 6: Repeat Round 4. 20 SC, 20 ch.
Round 7: Repeat Round 3. 40 SC, 40 ch.
Rounds 8-10: Repeat Round 4. 40 SC, 40 ch.
Round 11: Repeat Round 3. 80 SC, 80 ch.
Round 12: Repeat Round 4. 80 SC, 80 ch.
Move to body section.
Body
NOTE: There are three body sections. Section 1 uses MC and CC2. Section 2 uses MC and CC3. Section 3 uses MC and CC4. Continue to switch yarn colors every round as above, but be sure to use the designated contrast color in order to get the fade effect or color change effect you’d like to see in your beanie.
Section 1
Use MC and CC2 as your yarn colors, switching colors every round.
- Rounds 13-26: Switch colors, skip first sc, work (sc, ch 1) into next ch space, move stitch marker to first ch sp, *work (sc, ch 1) into next ch space, repeat from * around. 80 SC, 80 ch.
- Move to Section 2
Section 2
Use MC and CC2 as your yarn colors, switching colors every round.
- Rounds 27-40: Switch colors, skip first sc, work (sc, ch 1) into next ch space, move stitch marker to first ch sp, *work (sc, ch 1) into next ch space, repeat from * around. 80 SC, 80 ch.
- Move to Section 3
Section 3
Use MC and CC2 as your yarn colors, switching colors every round.
Rounds 41-54: Switch colors, skip first sc, work (sc, ch 1) into next ch space, move stitch marker to first ch sp, *work (sc, ch 1) into next ch space, repeat from * around. 80 SC, 80 ch.
Move to Brim
Brim
NOTE: Stop alternating colors when you reach the brim. Use only MC throughout.
- Round 55: Change to MC, skip first sc, work (sc, ch 1) into next ch space, move stitch marker to first ch sp, *work (sc, ch 1) into each of next 18 ch spaces, work SCTOGg in next ch space, repeat from * around ending with (sc, ch 1) in last ch space of round. 76 SC, 76 ch.
- Round 56: Skip first sc, work (sc, ch 1) into next ch space, move stitch marker to first ch sp, *work (sc, ch 1) into each of next 17 ch spaces, work SC2TOG in next ch space, repeat from * around ending with (sc, ch 1) in last ch space of round. 72 SC, 72 ch.
- Round 57: Skip first sc, work (sc, ch 1) into next ch space, move stitch marker to first ch sp, *work (sc, ch 1) into each of next 16 ch spaces, work SC2TOG in next ch space, repeat from * around ending with (sc, ch 1) in last ch space of round. 68 SC, 68 ch.
- Rounds 58-83: Skip first sc, work (sc, ch 1) into next ch space, move stitch marker to first ch sp, *work (sc, ch 1) into next ch space, repeat from * around. 68 SC, 68 ch.
- Round 84: *Sl st into next sc, sc into next ch, repeat from * around ending with sc into ch space. Sl st into top of first sc. Fasten off. 68 Sl sts, 68 sc.
- Move to Finishing
Finishing
Weave in ends. Block as desired.
Copyright Notes
It’s not nice to copy other people’s work so let’s not do that! All text and photos copyright 2022 by Regarding Yarn. No part of this pattern may be duplicated or sold. Final products made from this pattern are for personal use only and may not be sold.