Welcome to 12 Weeks of Beanies! We’re on Week 3 of free crochet patterns and if you’re looking for a free knitting beanie pattern, Beanie No 3 is the perfect pattern! The free knit pattern Beanie No 3 is the third in a series of crochet and knit beanie patterns designed with the beginning knitter or crocheter in mind. You can find the free crochet pattern for Beanie No 1 here which starts the 12 week series.
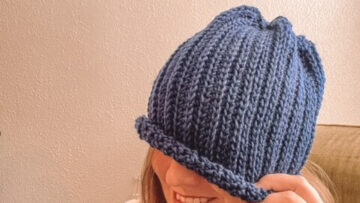
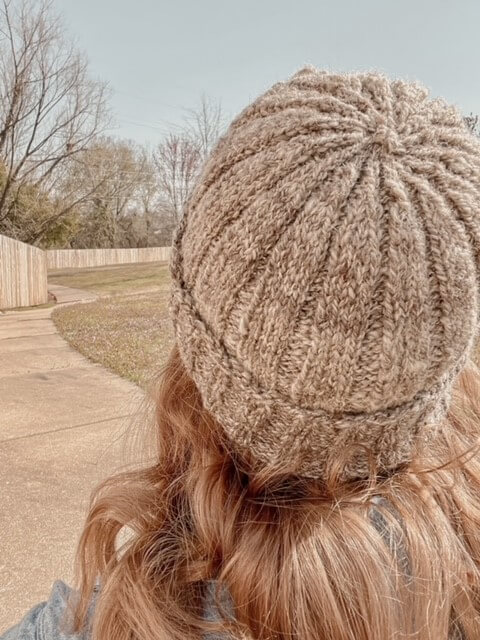
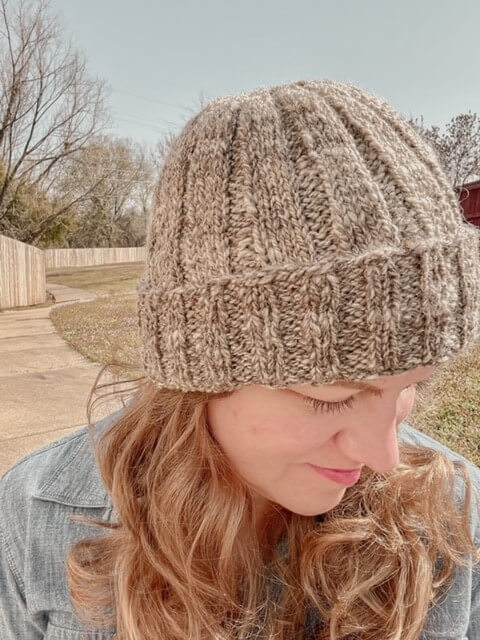
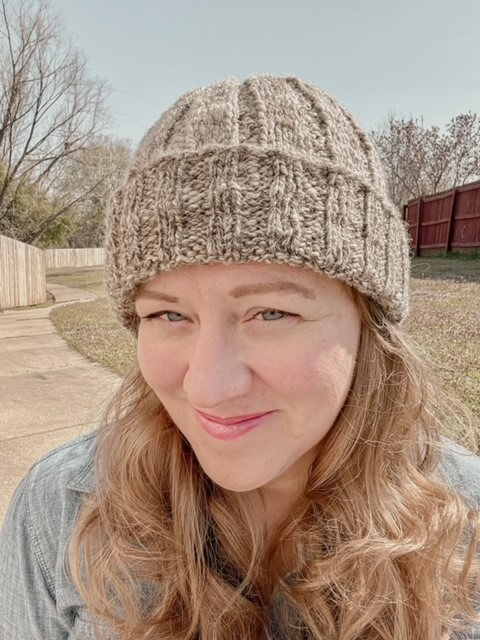
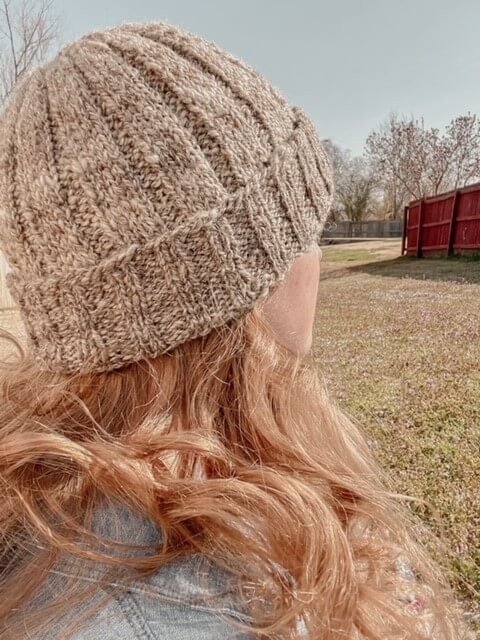
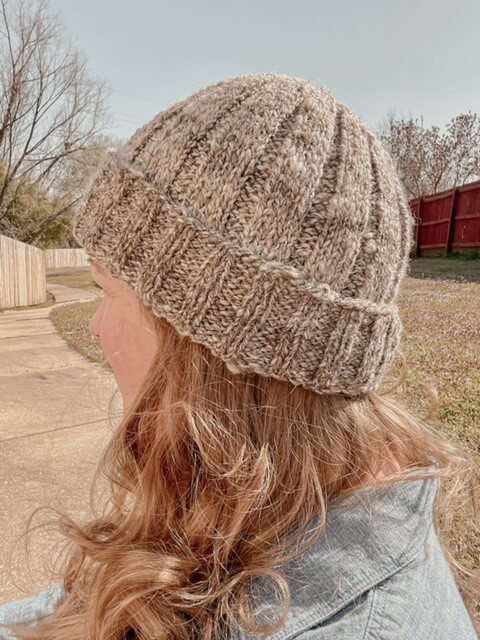
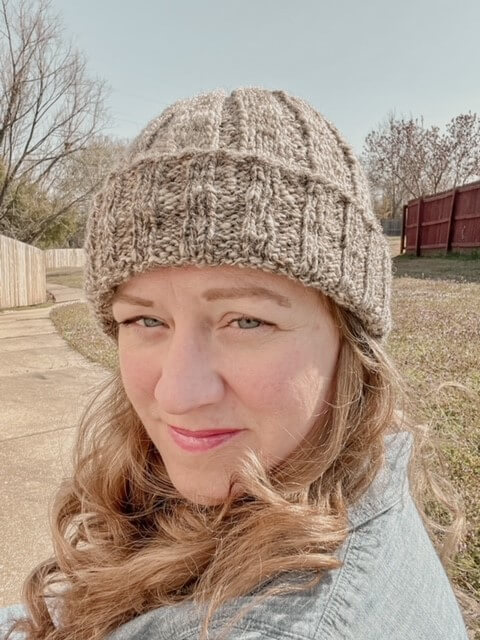
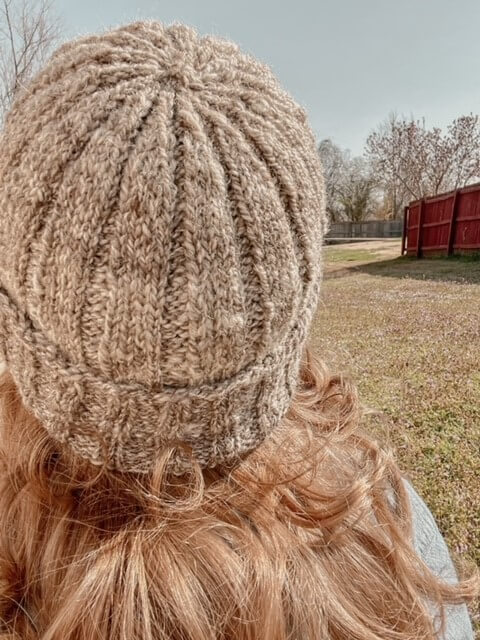
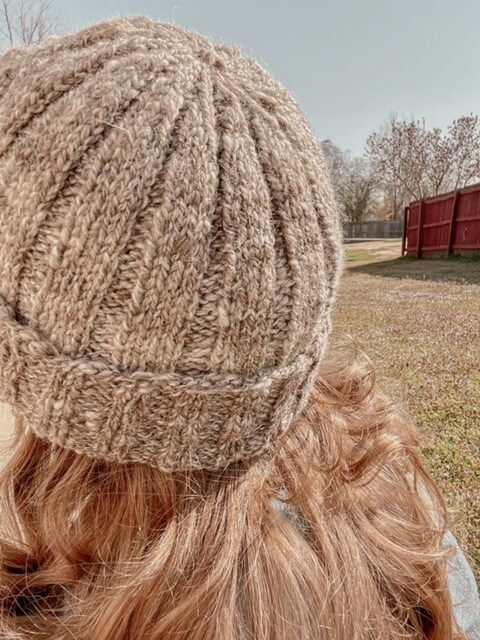
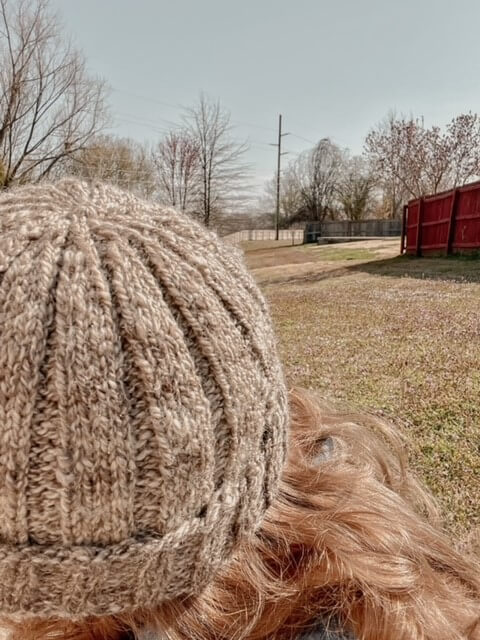
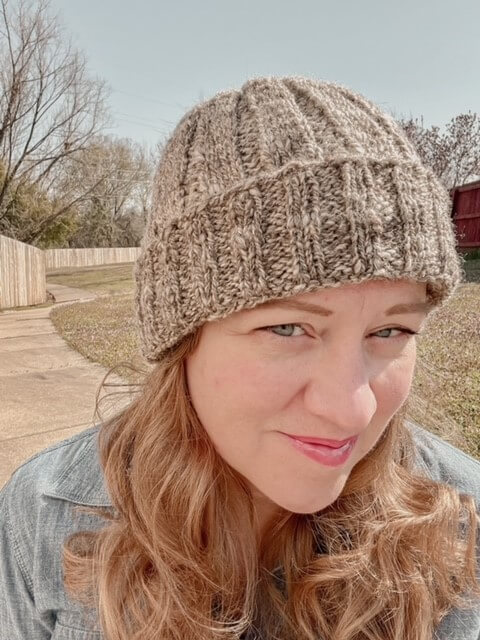
Beanie No 3 was designed with texture in mind! Knit from the bottom up, it uses a size 4 medium/worsted weight hand spun yarn from my stash and two easy knit/purl stitch patterns to create a really interesting textured beanie. It’s my first time using this stitch pattern and I think it would look great in a sweater or cowl pattern now that my Beanie No 3 is finished! I really love the elevated stitches through the crown that are created from the hat decreases.
For this free crochet pattern I’ve included several tutorials to make it easier for you, including a great new method for casting on – the German twisted cast on. I’ve just recently learned this cast on and it’s SOOOOOO good! It’s really similar to the long-tail cast on with an extra little step included that makes the cast on super stretchy, which is just perfect for a beanie brim (or sock cuffs!). I’ve also included a tutorial for how to join in my favorite method to knit in the round, and another one for how to decrease using the SSK, or slip-slip-knit method. Basically, if you can knit and purl, then you can totally make Beanie No 3!
Have I also mentioned this ENTIRE beanie series is FREE? Yep!! You’ll find every single one of the 12 Weeks of Beanies hats for free on my blog. This is just the third one, so don’t miss out when a new patterns drops. Sign up for my newsletter to be notified of new designs before anyone else!
AND I have a little surprise for you too – I plan to make these 12 beanie patterns into an eBook that you can purchase from my website or on Ravelry.com once they’ve all been published here on my blog. The eBook will be professionally formatted, include a range of sizes for each beanie pattern, and be a great collection of beanies you can refer to every year for personal and gift crocheting or knitting.
Instructions include:
- Construction + Fit/Ease
- Yarn Notes
- Yarn Amounts
- Needle Size
- Notions Required
- Gauge
- Sizes
- Hat Schematic
- Swatching Notes & Directions
- Stitch Abbreviations
- Special Stitches
- Tutorials
- The Beanie Pattern!
- Finishing Notes
- Copyright Notes
Disclaimer: Some of the links included in this pattern are sponsored links, which means that if you choose to click on them, I’ll receive compensation from the company at no cost to you. By clicking on these links, you’ll help me be able to continue providing free patterns. It’s a win/win for both of us!
Construction + Fit/Ease
Beanie No 3 is constructed bottom up in the round. It starts with the German twisted cast on, joins into a circle, and then the brim is worked. The body is worked next, and then decreases are made at the crown. The hat has a negative ease of 2” to keep it snug and tight over your ears for maximum warmth.
Yarn Notes
Since one goal of this project is to use up some stash yarn I’ve got and also to work in some handspun yarns, I dug into my yarn closet and found this great medium/worsted weight (size 4) yarn to use for Beanie No 3. This yarn is made of 100% mixed Blue-Faced Leicester sheep wool so it’s nice and warm. It’s only the third handspun yarn I’ve made so it’s got some bumpy texture to it, which I love. By using a heavier yarn it works up pretty quickly, so this beanie may be one you end up making over and over! I know you may not have a stash of handspun yarn sitting around, so I’ve included links to my favorite medium/worsted size 4 yarns which include:
$ Caron Simply Soft from Joann’s – this one should match gauge and it’ll give a more polished look since it’s smooth acrylic. It’s also …. very soft! LOL!
$ Wool of the Andes Worsted from Knit Picks – if you want that wooly texture and feel, this is gonna be your yarn of choice.
$ – $$$ Love Crafts Worsted Weight Yarns – LoveCrafts carries a wide range of worsted weight yarns in all sorts of price ranges, colors, and fibers that would work for this beanie.
Yarn Amounts
*FYI – The yarn amount listed here includes enough yarn to make 1 swatch + the hat
Main Color: 1 skein handspun yarn, 100% merino wool, 135 yards/80 grams
Needles
US Size 8 (mm) 16 inch circulars for the body
US Size 6 (mm) 16 inch circulars for the brim
*NOTE: You can also use DPNs or a 40 inch circular to do the magic loop method. Magic loop tutorial is below.
Notions
1 stitch marker
Embroidery Needle for weaving in ends
Gauge
20 stitches x 28 rows = 4”x4”
- 5 stitches per inch
- 7 rows per inch
Schematic
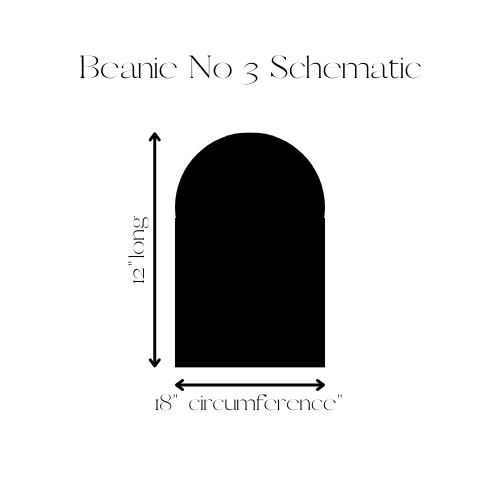
Sizes
Adult Size Medium to fit head circumferences 20-22”
- Finished circumference 18”
- Height from Crown to Brim = 12”
Swatch Notes
Because you’ll have different gauges when you knit flat versus knitting in the round, it’s important that you knit your swatch in the same way that you’ll be knitting your item. Since this hat is knitted in the round, you should also knit your swatch in the round. Check the tutorial section on how to swatch in the round if you’ve never done this before.
Swatch Directions
This swatch is worked in the round.
- Foundation Row 1 (RS): CO 32 sts. Knit across.
- Row 2 (WS): Knit across.
- Repeat row 2 three more times.
- Row 6 (WS): K4, p24, k4.
- Row 7: Knit 4, *k4, p2, repeat from * to last 4 sts, k4.
- Repeat rows 6 and 7 (17) more times for a total of 36 rows in pattern.
- Rows 8-11: knit across.
- Bind off and block swatch.
Stitch Abbreviations
- BOR = beginning of round
- CO = cast on
- K = knit
- P = purl
- RS = right side
- St = stitch
- WS = wrong side
Special Stitches
No special stitches for this beanie!
Tutorials
Swatching in the Round: https://www.youtube.com/watch?v=ZzC6N4SGhos
German Twisted Cast On: https://www.youtube.com/watch?v=UcwmCuIylII
How to Join for Knitting in the Round: https://www.youtube.com/watch?v=EXJpwbE0mtk
How to SSK: https://www.youtube.com/watch?v=Cg1ykku04is
How to Magic Loop: https://www.youtube.com/watch?v=1mqIqRdJc68&t=58s
Pattern
Brim
Foundation Row 1 (RS): CO 91 sts. K around. Join. Place BOR marker. 90 sts.
Round 2: *K2, P2, repeat from 8 around. 90 sts.
Rounds 3 – 14: Repeat row 2. 90 sts.
Move to Body.
Body
Round 1 (RS): *K4, p2, repeat from * around. 90 sts.
Repeat Round 1 (55) more times for a total of 56 rows.
Move to Crown Decreases.
Crown Decreases
Round 1 (RS): *K2tog, K2, p2, repeat from * around. 75 sts.
Round 2: *K3, p2, repeat from * around. 75 sts.
Round 3: *SSK, k1, p2, repeat from * around. 60 sts.
Round 4: *K2, p2, repeat from * around. 60 sts.
Round 5: *SSK, p2, repeat from * around. 45 sts.
Round 6: *K1, p2, repeat from * around. 45 sts.
Round 7: *SSK, p1, repeat from * around. 30 sts.
Round 8: *K1, p1, repeat from * around. 30 sts.
Round 9: SSK around. 15 sts. 15 sts.
Round 10: SSK around to last st, k1. 8 sts.
Move to Finishing.
Finishing
Cut yarn leaving a very long tail. Using the embroidery needle, weave the tail through the remaining 8 live stitches and pull to close. Tie a knot to keep the top closed, then weave in the ends. Block.
Now enjoy your Beanie No 3!
Copyright Notes
It’s not nice to copy other people’s work so let’s not do that! All text and photos copyright 2022 by Regarding Yarn. No part of this pattern may be duplicated or sold. Final products made from this pattern are for personal use only and may not be sold.